Following through on a new years resolution

One of the few creative things I can do is cook and bake, and tend to make things up as I go along. Here is my attempt to document my creativity.

Sunday, October 17, 2010

Banana Bread

This is one of my older recipes. I first made this in college, and this is my first baking recipe that was truly my own creation. It stemmed out of necessity because I would buy bunches of bananas at one time and I couldn't eat them fast enough. So I decided to over ripen them and turn it into bread. Basically, I ate a lot of banana bread in college. The bananas really should be over ripe, almost mostly brown or have LOTS of brown spots so the sugars are as naturally developed as possible. And I would recommend using an electric mixer or stand mixer to make this...even though back in college I was making this by hand.

Makes 1 loaf

3 bananas, very over ripe.
1 stick of butter at room temperature
3 eggs
1 teaspoon vanilla
1/2 cup brown sugar
1/2 cup white sugar
1 tsp baking soda
1 tsp baking powder
1/4 tsp salt
3 cups of flour
1 1/2 tsp cinnamon
1/2 tsp nutmeg - freshly grated with a microplane if possible
1/4 tsp cinnamon to top the bread
Pam nonstick cooking spray

In a separate medium bowl peel the bananas and mash them together. Set aside.

Preheat the oven at 350 degrees. With an electric mixer, beat the butter and eggs until incorporated. Add the sugars and vanilla and continue beating. Add the baking soda and powder and salt. Now add the flour 1/2 cup at a time, and completely mix in. By the time you reach three cups, the dough should appear pretty dry. Now add in the mashed bananas and continue to mix. Add in the cinnamon and nutmeg and stir until fully incorporated.

Prepare a loaf pan by coating it with Pam cooking spray.

Take a spatula to slowly pour the dough into the prepared loaf pan. Scrape completely. Sprinkle a 1/4 tsp of cinnamon on top of the dough. Bake uncovered for 1 hour. Do not disturb. After baking for an hour, take a knife and insert in the middle and pull out to check. If the knife is clean, it is done.
Posted by Picasa

Thursday, October 14, 2010

Easier Caprese Pasta Salad and Artichokes with Clarified Garlic Butter


This meal was inspired by a farm stand stop in Gilroy. We saw this place on the way up to San Jose, and I really wanted to stop on my way back. There was lots of amazing fresh produce, and some of the things I picked up were a braid of garlic, fresh mini heirloom tomatoes, and artichokes.
I have never clarified butter before, but thought I should give it a try because I wanted something to dip the artichoke in and look appealing. Clarifying butter is simply the process of removing the milk solids from the butter to create a yellow clear liquid. Something you would see on the side of you plate if you ordered lobster or crab at a restaurant. I created a garlic version of it, and it wasn't too garlicky at all. Or I am totally immune to it. I ended up putting the milk solids from the butter into the pasta. Why waste perfectly good butter. The pasta I served at room temperature
serves 4
Easier Caprese Pasta Salad - with butter solids.
1/2 pack (8oz or so) of penne pasta
1 pound of mix heirloom tomatoes (one small box)
5 tbsp EVOO - Extra Virgin Olive Oil
3 tbsp red wine vinegar
3 tbsp balsamic vinegar
1 large handful of basil (1/2 pack or so)
1 log fresh mozzarella
4 garlic cloves
Serves 2-3
clarified butter
3/4 stick of butter
2 cloves of minced garlic
Serves 2
2 steamed artichokes.
if you are steaming artichokes, I think it takes at least 45 minutes. Boil some water, drop in your steam attachment, lid it, and let it cook. I would turn it about every 15 minutes or so
on a separate pot, boil enough water for the half pack of pasta. add the pasta and cook as directed and add an extra minute or two. While the pasta is cooking, dice the tomatoes and mince the garlic. Julienne the basil. Cube the fresh mozzarella but set the aside to add in at the end. Drain the pasta when completed.
In a large bowl place the drained pasta. add the garlic, olive oil, and vinegars and toss. the oil and vinegars should unstick the pasta. Allow to cool for a couple minutes. add in the tomatoes and basil and toss.
in a small saucepan, meltdown the butter and add the minced garlic on medium low heat. when the butter is completed melted it should have bubbly white solids on top. Take a spoon and scrape the surface. Place whatever you scooped into the pasta dish. allow to cook for another minute and scrape the surface again. Repeat about 4 times or until the butter is clear. if there is garlic in it still that is fine. also if you scrape off some of the butter and placed that into the pasta dish, that is fine too, it just adds flavor. To serve, place a scoop of the pasta salad on a plate, with the artichoke, and place a serving of butter into the mini bowl to drip.

Wednesday, October 13, 2010

They Call Me Tater Salad

Makes 5-6 side servings
Goes well with the Waldorf Chicken Salad sandwich. I thought this came out pretty pretty decently for a 'simple' potato salad. But if I could do this again, I think a stalk of celery and 2 extra mini pickles would have been nice.
8 russet potatoes (these were small)
4 cloves of garlic
2 tsp dried dill
2 tbsp red wine vinegar
1 tbsp sweet pickle juice from the jar of pickles
6 mini sweet pickles
2 tbsp Dijon mustard
4 heaping tbsp mayo
salt and pepper

bring to boil several quarts of water, enough for the potatoes. Add in some salt.

In the meantime peel and clean the potatoes. Then dice into bit size pieces, but not too small. I like to cut the potato in half lengthwise, then cut into quarters, then cut the quarters either 3-4 times depending on the size of the potato. pile them into a bowl. add the taters in once the water is at a rolling boil. Cook for about 10 minutes, or until just tender for a fork to pass through. Drain in a coriander when complete.
While the potatoes are boiling... mince the garlic, and dice the mini pickles

Put the drained potatoes into a large bowl. add in the garlic, which should cook enough in the fresh hot potatoes. add in the pickles, dill, vinegar, pickle juice, mustard, and mayo. Mix gently so you won't mash the potatoes. Season with some salt and pepper to taste. Chill. Serve.

Tuesday, October 12, 2010

Waldorf Chicken Salad


The very original Waldorf salad originated at the Waldorf hotel in New York, which is now known as the Waldorf Astoria, back in 1893. The original salad had apples, celery, and walnuts. So here is my variation on it. I prefer pecans over walnuts, added chicken and garlic. It can be served on a bed of greens, pictured, or in a sandwich, which is not pictured, but with extra mustard is pretty bomb.

Serves 5.

2 cups diced chicken from 1 chicken breast - leftover from a rotisserie chicken. no skin
2 cups apple - from 3 very small apples. I would recommend a firmer cooking apple - no delicious variety
1.5 cups celery - from 3 stalks
2 garlic cloves minced
3/4 cups pecans
1 tsp Dijon mustard
1 lemon, juiced
salt and pepper
3 heaping tablespoons of mayo

if your pecans are raw, toast them in a pan on medium low, dry with no oil. This should only take a minute or two tops. remove them from heat and allow to cool.

Take out a large bowl. Dice all the ingredients and add them into the bowl as you are done cutting them up. The apple does not have to be peeled, I prefer the peel on since it adds a bit of color and flavor. I like to slice the apple into quarters, remove the core, cut them into 1/8ths, then dice them. The celery should be cut in half lengthwise then diced for smaller pieces. The chicken should be diced into small cubes and not shredded. The garlic should be finely minced. Run your knife through the pecans to cut them up and add that in the bowl. Mix them all together. add in the mustard and lemon juice. Mix well. the lemon juice should help prevent the apples from browning. if your apples are browning earlier than this, you can always juice the lemon earlier. Season with some salt and pepper. Add in the mayo. Mix well. Serve on a bed of greens with just a hint of dressing if you want (i used just a little bit of poppy seed dressing), or serve between two slices of bread for a sandwich.

Monday, October 11, 2010

Mediterranean Pasta


I was bottling my first batch of beer over at Diane's house, when she had this 'three layer dip' that she bought from the farmers market that day. the bottom layer was pesto, the middle layer was sun dried tomatoes, the top layer was feta. I thought it tasted VERY Mediterranean and said hmm, I need to incorporate this into something. My friend Summer was having a wine social that weekend and I thought this dish was a pretty good idea. But rather than make the dip, I turned it into a pasta dish. I like using rotini pasta for pesto because the little basil bits gets stuck in the middle of the corkscrews and it seems to lock in that flavor. This dish can be served warm, room temperature, or cold like a pasta salad. If you want to take a pretty good shortcut and not make the pesto from scratch like I did, just buy from the refrigerated section from your grocery store the premade pesto, and you'll probably have to use the entire four ounce container.


Serves a crowd as side dish or makes a main entree for 5


1 pound of rotini pasta - I used the organic one from Trader Joes
1 small jar of sundried tomatoes in olive oil
2 teaspoons of sun dried tomato olive oil from that jar
1 small container of crumbled goat cheese feta. Or use regular feta.
Pesto - approximately 1 cup
a generous sprinkle of parm cheese

Makes approximately 1 cup of Pesto:
1/2 large pack (approximately 2 handfulls) of fresh basil
1/4 cup pine nuts
5 cloves of garlic
1/4 cup of grated Parmesan cheese
salt and pepper
Extra Virgin Olive Oil - EVOO

Boil enough water as directed for the pasta. While the water is going make the pesto.
How to make the pesto. In a food processor, take your cleaned basil and remove the stems and stuff it in. Add in the pine nuts and cloves of garlic - no need to mince, the processor does the work for you. Add in the parm cheese and season with salt and pepper. Take the EVOO and pour three turns in the food processor over these ingredients. close it and allow the food processor to rip. While it is chopping away, slowly pour the EVOO through the top of the opening and stream in while its processing. You can watch it emulsify and stop when it's at the good consistency. I would consider a good consistency to be liquefied basil leaves, but not sitting in a soup of olive oil.

Cook the pasta as directed - but add 2 minutes to the cook time. I didn't like the al dente consistency, and wanted it to be slightly more tender, but not close to being mushy. Package said 9 minutes, I cooked for 11 and was happy with that result. Drain. Take the pasta and dump into a bowl.

Pour over the pasta your pesto. Mix. Dice up the sun dried tomatoes if they are not already diced. Be sure to scrape up the olive oil if you are cutting up the sun dried tomatoes and put that in the bowl too. Pour over the top most of the feta. Toss. Top with the rest of the feta, and also add over the top a generous sprinkle of Parmesan cheese. Serve.


Thursday, October 7, 2010

Green Chile Enchiladas

It's been awhile since I made real enchiladas and not an enchilada casserole. However, this dish still has many elements that are little more casserole like. Most enchiladas only come with just meat and cheese. I love to layer in different flavors.

Serves 6

1 pound / large can of green enchilada sauce
1 chicken breast from a leftover rotiseree chicken and add a little bit of dark meat too. Diced.
3 whole red chiles. Remove seeds and dice.
1 can mild green chiles (one mini can)
1 onion, diced
3 garlic cloves, minced
1 can black beans, rinsed and drained.
1/2 small container heavy whipping cream (eyeball it)
6 flour tortillas
1.5 cups mozzarella cheese, shredded
1.5 cups sharp cheddar cheese, shredded

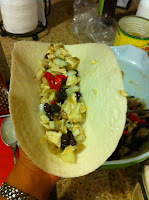
In a large bowl combine the chicken, both chiles, onion, garlic, and beans. add a generous splash of green enchilada sauce and mix thoroughly.
Take a 9 x 13 baking dish and pour enough enchilada sauce to coat the bottom, but not too much that it's swimming in it. Then take the whipping cream and drizzle in a few tablespoons of heavy whipping cream. Stir to mix.

Grab a tortilla and fill with a few big spoonfulls of the mixture. Then add little of each cheese. Roll it up and place in the baking dish that is lined in sauce. Repeat until your pan is full.

Pour over the top the rest of the can of enchilada sauce evenly over all the enchiladas. Then take the whipping cream and pour a little over the top as well. Top with mozarella and cheddar cheeses. Cover with foil, and bake in a 375 oven for 30 minutes. Then remove the foil, then broil for 5-10 minutes, until just browned on top. Allow a few minutes to cool before serving.


Enchiladas Raw Enchiladas Done